How to Build a Waterfall for Your Backyard Oasis
Imagine relaxing in your backyard, surrounded by lush greenery, while the soothing sound of water cascades down a beautiful waterfall. Water features like waterfalls not only add a tranquil ambiance to your outdoor space, but they also enhance the aesthetic appeal and value of your home.
Building a waterfall can be an incredibly rewarding DIY project, but it also requires careful planning, the right tools, and a bit of expertise to ensure it functions correctly and looks stunning. While tackling this on your own is possible, trusting professionals like Raber Landscaping can make the process smoother and ensure the best results. In this guide, we'll walk you through the basic steps to create a waterfall in your backyard and explain when it's time to call in the pros.
Step 1: Plan and Design Your Waterfall
Before you start digging, the first step in building a waterfall is creating a solid plan. Think about where you want your waterfall to be located and how it will blend with the rest of your landscape.
Key Considerations:
- Water Source: Will the waterfall flow into a pond, a small basin, or a recirculating system?
- Power Supply: You'll need access to an electrical outlet to power the waterfall pump.
- Slope: Natural slopes are ideal for waterfalls, but you can create an artificial one if needed. The height of your waterfall will determine how much digging and construction are required.
- Aesthetics: How do you want your waterfall to look? Consider the size, style, and materials. Should it have a natural feel with rocks and plants, or a more modern design?
Once you’ve determined these details, sketch out a rough design. At Raber Landscaping, we always recommend starting with a vision and working toward it.
Step 2: Dig the Pond or Basin
If your waterfall will flow into a pond, you'll need to dig a hole for it first. The pond will act as the reservoir where the water will be pumped up to the waterfall.
Instructions:
- Mark the Area: Use spray paint or a garden hose to outline the pond's shape. Make sure it's large enough to accommodate the volume of water and any fish or plants you may want to add.
- Start Digging: Dig to a depth of 18-24 inches, depending on how large you want the pond. A deeper pond can hold more water and allow for fish or aquatic plants, while a shallower basin is better suited for smaller garden waterfalls.
- Level the Ground: Ensure the edges of your pond or basin are level so that water doesn't spill over unevenly. You can use a carpenter’s level for precision.
For many DIYers, this is the most labor-intensive part of the process. If you're working with heavy materials like large rocks or want a more intricate design, calling in professionals like Raber Landscaping ensures the pond is dug properly, with the right dimensions for long-term success.
Step 3: Build the Frame for Your Pond
With the hole dug, it’s time to construct the frame for your pond or basin. This provides structure and support, ensuring the pond holds up over time.
Instructions:
- Line the Pond: Use a pond liner to prevent water from seeping into the soil. Rubber liners are durable and flexible, making them an excellent choice for most backyard projects. Smooth out any wrinkles or folds as much as possible.
- Install Edging: Use rocks, pavers, or bricks to line the edges of your pond. Not only does this secure the liner in place, but it also creates a natural look for your pond. Be sure the edging material is stable and won't shift over time.
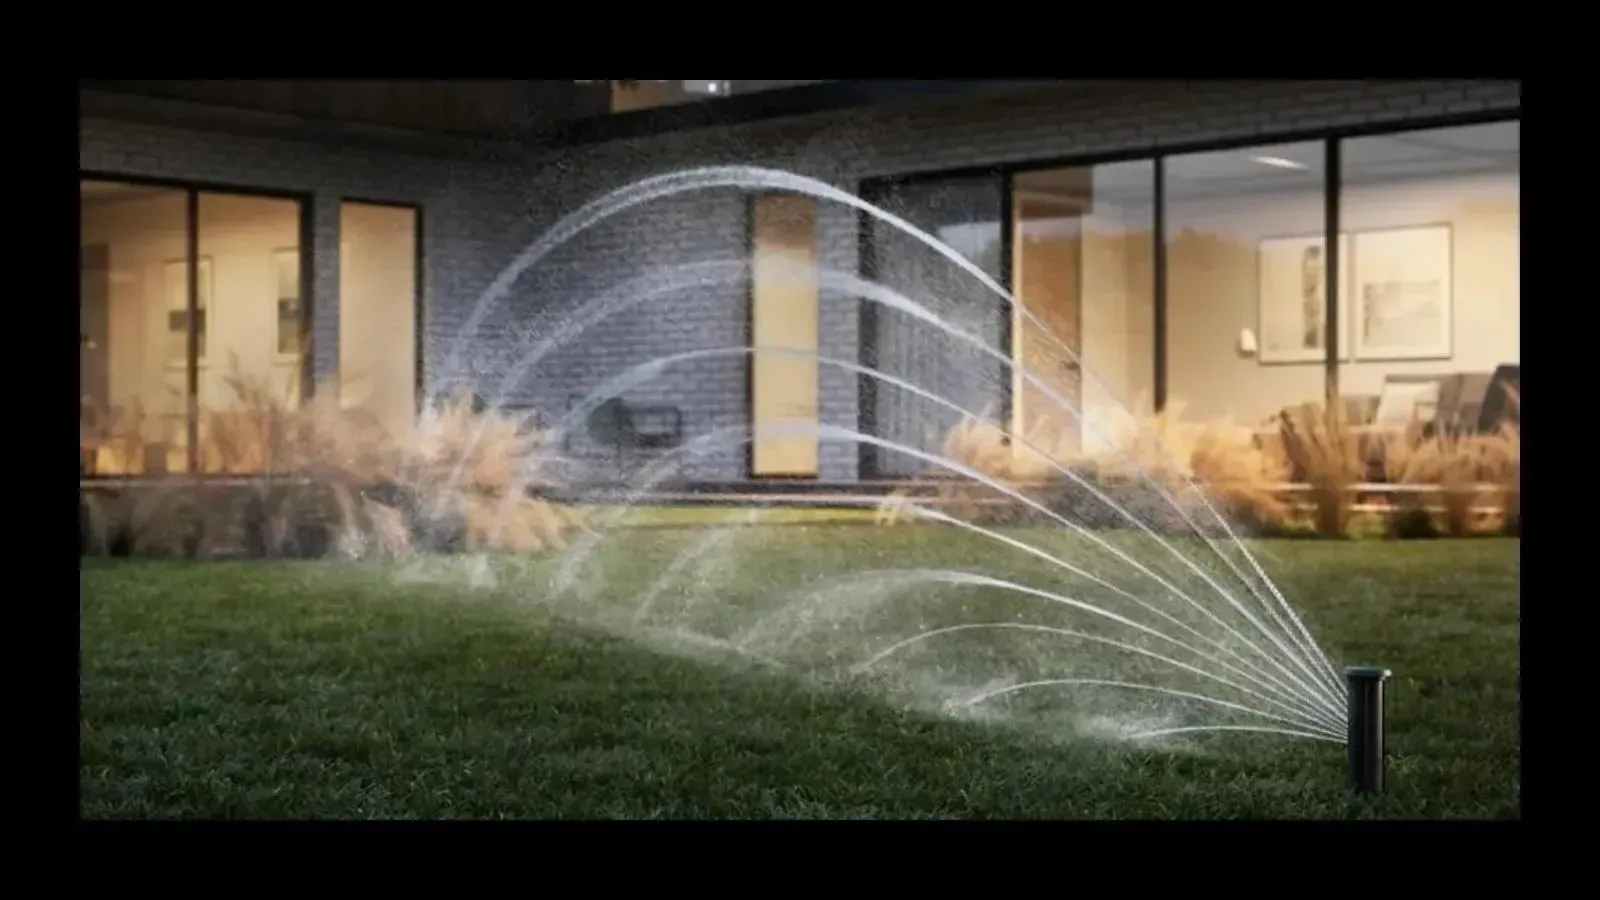
Step 4: Set Up Your Waterfall Pump
The waterfall pump is what keeps the water circulating, moving it from the pond up to the top of the waterfall. Choosing the right pump is essential to ensure your waterfall flows smoothly.
Instructions:
- Choose a Pump: The size of the pump depends on the height and width of your waterfall. A good rule of thumb is that the pump should circulate the pond’s total volume every two hours. Most pumps are measured in gallons per hour (GPH); for example, a 500 GPH pump is suitable for a small waterfall with a pond holding around 1,000 gallons of water.
- Install the Pump: Place the pump at the bottom of the pond or basin, making sure it’s stable and fully submerged. Connect it to an outdoor-safe electrical outlet using a GFCI outlet to protect against shocks.
- Attach the Tubing: The pump will push water up to the top of your waterfall via a hose or tubing. Attach one end of the tubing to the pump and run the other end to the top of the waterfall structure.
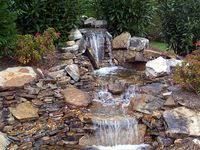
Step 5: Create the Base for the Waterfall
Now it’s time to start building the base of your waterfall. This is where the water will cascade down into the pond or basin.
Instructions:
- Build a Slope: If your yard doesn’t have a natural incline, you’ll need to create an artificial slope. This can be done using dirt, gravel, or even concrete blocks. The higher the slope, the more dramatic the waterfall will be.
- Secure the Liner: Extend the pond liner up the slope to create a waterproof barrier. Make sure the liner overlaps into the pond to prevent water from escaping the system.
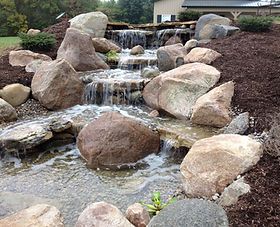
- Build Layers: For a natural look, stack flat stones, rocks, or pavers on top of one another to form the cascade. Use a combination of large, flat stones to create ledges and smaller rocks to fill in gaps.
Step 6: Assemble the Waterfall
Once the base is ready, it’s time to assemble the main structure of your waterfall.
Instructions:
- Position the Stones: Stack large stones or bricks along the slope to create the cascade effect. You want to create multiple layers so the water flows gently over each ledge, creating a calming sound.
- Secure with Foam Sealant: Use waterfall foam sealant to fill in any gaps between the stones and direct the water flow. This prevents water from leaking behind the rocks and ensures the water cascades over the stones.
- Check the Flow: As you build, visualize how the water will flow. Adjust the rocks as needed to create a more dramatic or gentle cascade, depending on your preference.
Step 7: Attach Your Tubing
Now that the waterfall structure is in place, it’s time to connect the tubing from the pump to the top of the waterfall.
Instructions:
- Hide the Tubing: Run the tubing along the back or side of the waterfall structure, where it won’t be visible. You can tuck it between rocks or use soil and plants to camouflage it.
- Secure in Place: Make sure the tubing is securely attached to both the pump and the waterfall outlet. You can use clamps or zip ties to keep the tubing in place and prevent leaks.
Step 8: Test the Waterfall Pump
Before you finish the project, it’s crucial to test your pump and make sure everything is working properly.
Instructions:
- Fill the Pond: Fill your pond or basin with water, making sure it’s deep enough to submerge the pump.
- Turn on the Pump: Plug in the pump and watch the water flow over the waterfall. Check for any leaks or areas where the water isn’t flowing properly. You may need to adjust the rocks or foam sealant to fine-tune the cascade.
- Make Adjustments: If the flow seems too weak or too strong, adjust the pump’s settings or reposition the rocks for better water distribution.
Step 9: Decorate Your Waterfall

Now comes the fun part—decorating your new waterfall to make it blend seamlessly with your outdoor space.
Instructions:
- Add Plants: Surround the waterfall with plants like ferns, grasses, and flowering perennials to create a natural look. Water-loving plants like water lilies and lotus can be added to the pond itself.
- Use Lighting: Install outdoor lighting around the waterfall to create a stunning evening display. Submersible lights can illuminate the water from within the pond, while landscape lights highlight the surrounding area.
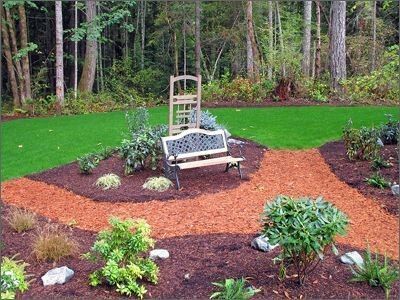
- Incorporate Decorative Elements: Add decorative touches like garden statues, stepping stones, or a small bench nearby, so you can fully enjoy the tranquil sound of the water.
Why Trust Raber Landscaping to Install Your Waterfall
While building a waterfall yourself can be a rewarding project, it’s not without challenges. If you want a waterfall that functions flawlessly, looks natural, and adds real value to your property, it’s worth considering professional installation. Here’s why:
- Expert Design: Raber Landscaping can help you design a waterfall that fits seamlessly with your existing landscape, whether you want a natural look or a more modern, sleek design.
- Quality Installation: Our team has the experience and tools necessary to install your waterfall correctly the first time. We ensure that all pumps, liners, and rocks are placed perfectly for maximum efficiency and beauty.
- Guaranteed Results: With Raber Landscaping, you don’t have to worry about leaks, poor water flow, or improperly placed stones. We stand by the quality of our work, ensuring you’ll love the finished product.
Conclusion
Building a backyard waterfall is a fantastic way to enhance your outdoor space, providing both beauty and relaxation. While it’s possible to tackle this as a DIY project, the complexity of installation and the need for precise execution means trusting professionals like Raber Landscaping can save time, effort, and frustration.
Whether you choose to build your own waterfall or hire experts, the result will transform your yard into a peaceful retreat, perfect for unwinding and enjoying nature. Ready to make your dream waterfall a reality? Contact Raber Landscaping today! 330-440-9451